Learn how to take off jumper cables safely with this step-by-step guide. Avoid sparks and stay safe during the process.
If you’re like me, car troubles are the worst. A few years ago, I got stuck in a grocery store parking lot with a dead battery. I had to call a friend for help, and after struggling with jumper cables, we finally got the car started. But then came the hard part, taking off the jumper cables. I didn’t realize there’s a specific way to do it safely, so when sparks started flying, I almost had a heart attack!
That experience taught me something important: fast decision making in situations like this is crucial, and disconnecting jumper cables the right way is just as important as knowing how to use them. If you’re wondering how to do this safely, you’re in the right place. Let’s walk through the steps together, talk about why they matter, and make sure you’re prepared.
Article Breakdown
Why Removing Jumper Cables Safely Is So Important
Let’s talk about why safely removing jumper cables is so important. If you’ve ever seen sparks fly when cables touch or heard of electrical surges frying a car’s electronics, you know how serious this can be. Here’s what can go wrong if you don’t handle jumper cables properly:
- Sparks can be dangerous: While sparks might seem harmless, they can ignite any flammable gases around the battery.
- Electronics can get damaged: Cars today are full of sensitive electronics. A sudden surge can cause serious damage.
- You can get hurt: Mishandling cables could lead to burns or even electric shock.
So, it’s not just about getting your car started, it’s about doing it safely to protect yourself and your vehicle.
Step-by-Step Guide to Safely Disconnect Jumper Cables
Now that we know why this matters, let’s get into the nitty-gritty. Here’s how you can safely remove jumper cables after jump-starting your car.
Step 1: Keep the Jumped Vehicle Running
Once your car is successfully started, let it run for at least 5–10 minutes before you even think about touching the cables. Why? Your car’s alternator needs time to recharge the battery. Think of it like plugging your phone into a charger, it doesn’t reach full power instantly. Letting the car run ensures the battery has enough juice to stay alive after the cables are removed.
Example: Imagine trying to run a marathon after sitting on the couch for weeks. Your body wouldn’t be ready, right? Your car’s battery is the same, it needs a little warm-up time to get back to full strength.
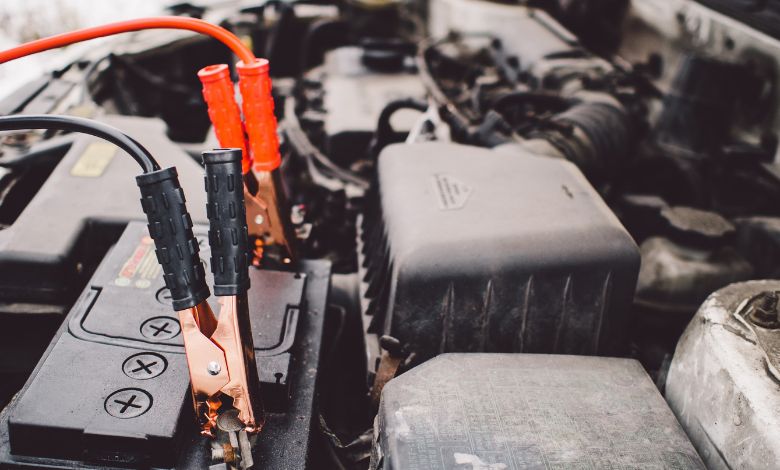
Step 2: Start with the Negative Cable on the Boosted Car
Here’s a golden rule to remember: always remove the negative (black) cable first. Begin by disconnecting the black clamp from the negative terminal of the car you just jump-started. The reason? This breaks the circuit and minimizes the risk of sparks or electrical mishaps.
I learned this the hard way during my parking lot fiasco. I mistakenly removed the positive cable first and ended up with a mini fireworks show. Not fun.
Step 3: Remove the Negative Cable from the Donor Car
Next, disconnect the black cable from the negative terminal of the car that provided the jump. By now, the circuit is fully broken, and you’ve eliminated most of the risk.
This step reminds me of unplugging Christmas lights. You always start with the main plug to avoid a mess of live wires, right? Same concept here, cut the power safely by starting with the negatives.
Step 4: Disconnect the Positive Cable from the Boosted Car
Now it’s time to remove the red (positive) cable from the car you jump-started. By this point, the circuit is no longer active, so the risk of sparks is low. Still, handle the cables carefully to avoid any accidental contact with metal surfaces.
Step 5: Finish by Removing the Positive Cable from the Donor Car
Finally, disconnect the positive cable from the donor car. Hold the cables apart, and make sure the clamps don’t touch each other or any metal parts of the car. Once everything is disconnected, you’re good to go.
The Science Behind the Order: Why It Matters
You might be wondering: Why does the order of removal matter so much? Here’s the deal. When you jump-start a car, you’re creating a temporary electrical circuit between two batteries. If you disconnect the positive cable first, there’s a chance it could touch metal, causing a spark or short circuit. By removing the negative cable first, you break the circuit in a controlled way, reducing the risk of anything going wrong.
Think of it like turning off a leaky faucet. You don’t want water spraying everywhere, so you turn off the main valve before dealing with the rest. The same principle applies here.
Common Mistakes to Avoid
Even with the best intentions, mistakes happen. Here are a few common pitfalls to watch out for:
- Removing the Positive Cable First: As we just discussed, this can lead to sparks and potential damage.
- Letting Cables Touch Each Other: When clamps connect, they can complete a circuit and cause a dangerous spark.
- Not Inspecting the Cables: Damaged or frayed cables can result in poor connections or even fires.
Troubleshooting: What If Your Car Dies After Removing the Cables?
So, you followed all the steps, but your car still won’t stay running after removing the cables. What now? This could indicate a deeper issue with your car’s battery or electrical system. Here’s what you can do:
- Check the Battery: If your battery is old or heavily corroded, it might not hold a charge anymore. Consider replacing it.
- Inspect the Alternator: The alternator is responsible for charging your battery while the car runs. If it’s faulty, your battery won’t stay charged.
- Call a Mechanic: Sometimes, the problem is more complex than a simple jump-start can fix. Don’t hesitate to seek professional help.
Pro Tips for Handling Jumper Cables Like a Pro
- Wear Protective Gear: Gloves and safety glasses can protect you from sparks or accidental contact with battery acid.
- Inspect Your Cables: Before using jumper cables, check for frays, exposed wires, or corrosion. Damaged cables can be dangerous.
- Practice Makes Perfect: If you’ve never used jumper cables before, practice connecting and disconnecting them in a safe environment. Familiarity can make all the difference in a real emergency.
How I Stay Prepared for Dead Batteries…
Looking back on my experience with jumper cables, I realized how much we take basic car knowledge for granted. It’s easy to assume you’ll figure it out in the moment, but trust me, preparation is key. Now, I keep a laminated cheat sheet in my car with the steps for jump-starting and removing cables safely. It’s a small thing, but it gives me peace of mind.
If you’re someone who likes to be prepared (or just wants to avoid embarrassing parking lot moments), I highly recommend doing the same.
Key Takings
- Knowing how to safely remove jumper cables is a crucial skill, whether you’re a beginner or experienced.
- Proper technique ensures safety for you, your car, and others assisting.
- Follow clear steps to confidently handle a dead battery situation.
- Share your jumper cable stories in the comments, your experience could help someone else.
Additional Resources
- How to Use Jumper Cables: A detailed guide on properly using jumper cables, including safety tips and step-by-step instructions.
- How to Jump Start a Car in 9 Steps: A concise, easy-to-follow 9-step process for safely jump-starting a dead car battery.
- The Right Way to Jump-Start a Dead Car Battery: Learn the correct and safe way to jump-start a dead car battery with this comprehensive guide.