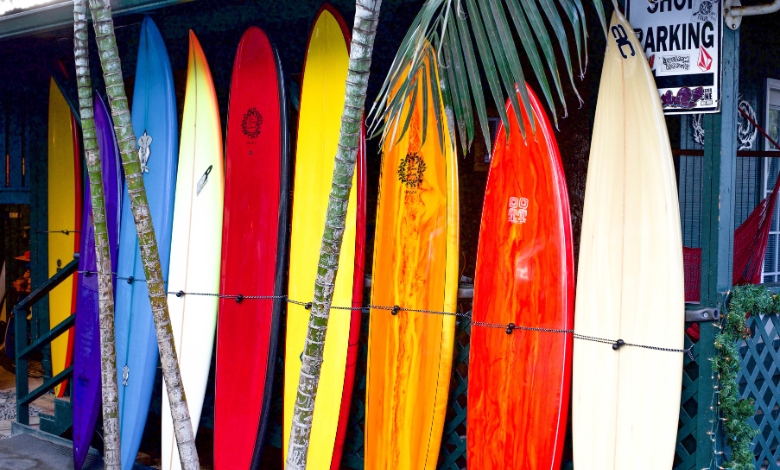
Discover what kind of paint to use to repaint a surfboard and learn how to apply it for stunning, long-lasting results.
Have you ever taken a good look at your surfboard and thought, “Wow, it really needs a makeover”?
Maybe it’s gotten faded from the sun or is full of scratches from all those wipeouts.
If that’s the case, learning how to repaint your surfboard is not only practical but also a fun way to add your personal touch while being eco-friendly.
I’ve been through this process myself, and I can tell you that with the right guidance, you can turn your surfboard into a real eye-catcher, both in and out of the water, without hurting the environment.
So, let’s check out what eco-friendly paint to choose, how to apply it for lasting results, and a simple, step-by-step guide to make the whole thing easy and stress-free.
Article Breakdown
Why Repainting Your Surfboard Is Worth the Effort

First, let me set the scene.
I was standing in my garage one afternoon, looking at my old, battle-worn board, which had seen better days.
It was practically begging for some TLC.
Repainting it wasn’t just about making it look good—it was about reclaiming that feeling of excitement I had when I first took it out on the water.
Plus, a well-done paint job adds an extra layer of protection that helps extend the board’s life.
So, whether you’re aiming to revive your board’s glory days or express your personality through custom designs, repainting can be a rewarding project.
Choosing the Right Kind of Paint for Your Surfboard
Let’s talk paint.
This isn’t just about grabbing whatever leftover can is sitting in your basement.
To get that sleek, durable finish, you need the right type of paint:
- Acrylic Paint: This is my personal go-to. It’s flexible, water-resistant, and adheres well to the board’s surface. The best part? It comes in every color imaginable. Acrylic paint strikes that perfect balance between quality and ease of use, making it great for beginners and experienced DIY-ers alike.
- Marine-Grade Paint: If you’re serious about durability, marine-grade paint is the gold standard. Designed to withstand harsh conditions (think saltwater, sun, and repeated exposure to waves), it’s what professionals might use. The downside? It can be pricier and requires more careful application.
- Spray Paints: Not all spray paints are created equal. If you go this route, choose spray paints that are labeled for outdoor or marine use. Brands like Krylon and Rust-Oleum have great options that offer a good balance of durability and color vibrancy.
Pro Tip: Always check that your chosen paint is non-toxic and safe for use on surfboards. You don’t want chemicals leaching out into the water or affecting the board’s performance.
Supplies You’ll Need
Before we get into the nitty-gritty, gather your supplies.
There’s nothing worse than realizing mid-project that you’re missing something crucial.
Here’s a handy checklist:
- Acrylic or marine-grade paint (in your chosen colors)
- Sandpaper (220-320 grit for a smoother finish)
- Masking tape
- Clear acrylic sealant or marine-grade varnish
- Paintbrushes or foam rollers (for even coverage)
- Old towels or sheets (to protect your workspace)
- A mask (to avoid inhaling paint fumes)
- Gloves (because painted hands aren’t fun)
Step-by-Step Guide to Repainting Your Surfboard
Step 1: Prep Your Workspace
Let’s set the scene.
I remember doing my first board paint job in my garage, only to end up with specks of paint on my dad’s old car.
Not ideal.
So, make sure you’ve got a clean, well-ventilated space.
Lay down old towels or sheets to protect your floor,
and keep windows open if you’re indoors to help with ventilation.
Step 2: Sand Your Surfboard
Sanding is non-negotiable.
This step ensures your paint adheres smoothly to the board.
Use 220-320 grit sandpaper and work gently over the board’s surface.
Your goal is to create a rougher texture that the paint can cling to, not to sand down to the foam core.
Personal Tip: I found that sanding by hand gives me better control, especially around edges and curves. Power sanders can be a bit aggressive if you’re not careful.
Step 3: Clean the Board
Wipe down your board with a damp cloth or tack cloth to remove dust and particles from sanding.
Any leftover debris can ruin your paint job and leave you with a bumpy, uneven finish.
The first time I did this, I skipped the cleaning step and ended up with a finish that looked like the surface of the moon.
Don’t make that mistake.
Step 4: Apply Masking Tape
Use masking tape to protect areas you don’t want painted, like the fin box or rail edges.
Trust me, a clean edge makes all the difference between a professional look and something that screams “DIY disaster.”
Step 5: Start Painting
Now comes the fun part.
If you’re using acrylic paint, apply it with a foam roller or brush in thin, even layers.
Start with a base coat and let it dry completely before adding additional layers or designs.
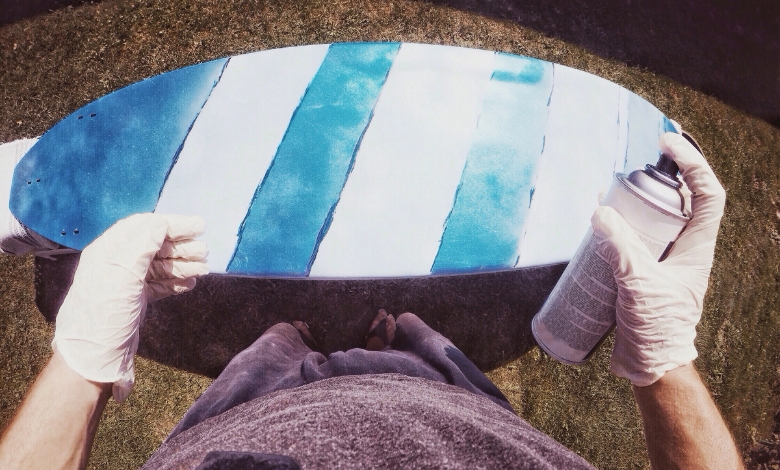
For spray paint, hold the can about 8-12 inches away from the board to avoid drips and uneven coverage.
Pro Tip: Multiple thin coats are better than one thick one. This prevents cracking and helps the paint adhere more effectively.
Step 6: Add Your Personal Touch
This is where you can let your creativity shine—unleashing your imagination and exploring new ideas.
Whether it’s a bold graphic, a simple stripe, or an intricate wave design, go wild!
If you’re nervous about freehanding, use stencils or templates to guide your designs.
For example, I once painted a wave design inspired by my favorite surfing spot.
It was far from perfect, but every time I caught a wave, it felt like a tribute to my home beach.
Step 7: Seal the Deal
Once your masterpiece is dry (I usually wait 24 hours, just to be safe), it’s time to seal it.
Apply a clear acrylic sealant or marine-grade varnish to protect your paint job from the elements.
This step is crucial for preventing fading, chipping, and water damage.
Pro Tip: Use a foam roller or spray for the sealant to avoid brush strokes. And don’t skimp—apply at least two coats, allowing each to dry thoroughly.
Step 8: Let It Cure
Patience is key here.
Let your board cure for at least 48 hours before taking it out on the water.
This allows the paint and sealant to set properly, ensuring maximum durability.
Frequently Asked Questions (FAQs)
Will my board perform differently after being painted?
As long as you apply thin, even layers and avoid adding too much weight, the performance should remain unchanged. Heavy layers can affect the board’s buoyancy and speed.
Do I need to use a primer before painting?
For most acrylic paints, a primer isn’t necessary. However, if you’re using spray paint or marine-grade paints, a primer can help with adhesion and color vibrancy.
Can I repaint an epoxy surfboard?
Yes, you can. The process is nearly identical to repainting a traditional fiberglass board, just be sure to use paint that adheres to epoxy surfaces.
Pro Tips and Tricks for a Flawless Finish
- Avoid painting on humid days: Humidity can cause paint to dry unevenly or stay tacky longer than expected.
- Test your design: If you’re unsure about a specific color or design, practice on a piece of cardboard first.
- Protect your work: Place your board on an elevated surface (like sawhorses) to keep it steady and make painting easier.
Key Takings
- Repainting a surfboard isn’t just a task—it’s an experience.
- When I first repainted mine, it wasn’t just about the aesthetics; it was about making that board my own again.
- I wanted to ride the waves on something that told a story—my story.
- And when you finally finish yours, you’ll feel the same rush of satisfaction.
- So go on, transform your surfboard into a masterpiece that not only reflects who you are but rides as fiercely as the first day you got it.
- And remember, it’s okay if it’s not perfect.
- It’s your board, your project, your ride.
Additional Resources:
- How to Paint Your Surfboard (with video)– A step-by-step video guide to help you transform your surfboard with paint.
- How To Paint A Surfboard with Surfpaints – Discover tips and techniques for using Surfpaints to create a unique design on your board.
- Art Of The Surfboard – Explore the creative side of surfboards and find inspiration for your own artistic expressions.
- How to spray paint a surfboard – Learn the essentials of spray painting your surfboard for a smooth and vibrant finish.


