Discover how the Polaris Sportsman 500 ball joint removal tool works and how you can replace worn ball joints easily and safely.
The Polaris Sportsman 500 ball joint removal tool is a hand-operated press that lets you remove and install ball joints safely without damaging the control arm. It makes the job way faster and cleaner than trying to hammer anything out. Like other equipment maintenance guides, having the right tool for the job saves both time and potential damage.
The first time I tried to pull a ball joint out of my Polaris Sportsman 500, I thought, “How hard can this be?” I had this idea that it would pop out easily. Yeah… that didn’t happen.
I spent hours wrestling with it, thinking maybe I just wasn’t strong enough. Or maybe the joint was secretly glued in. That’s when I learned about the Polaris Sportsman 500 ball joint removal tool… and let me tell you, it completely changed the game.
Suddenly, what had been frustrating, sweaty, and slightly terrifying became smooth, controlled, and almost satisfying. I want to walk you through everything I figured out the hard way — from choosing the right tool, to actually getting the job done without smashing anything important. Let’s figure this out together.
Article Breakdown
What the Polaris Sportsman 500 Ball Joint Removal Tool Actually Is
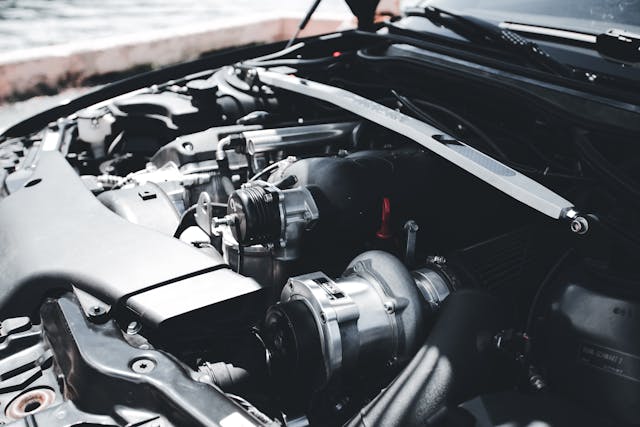
At its core, this tool is a hand-operated press that pushes the ball joint out of the control arm without bending or cracking anything.
Think of it like this… you’re not smashing or hammering, you’re gently convincing the ball joint to let go.
Here’s what you need to know:
- Most Polaris Sportsman 500 ball joints are press-fit. That means hitting them with a hammer isn’t going to work.
- The tool uses controlled force to remove the joint cleanly.
- A good ball joint tool protects both your control arm and the new joint you’re about to install.
If you’ve ever tried this without the right tool, you already know why it’s worth every penny.
Why You Should Never Remove a Ball Joint Without the Proper Tool
I know someone’s thinking, “Just hit it with a hammer, right?” Yeah… don’t.
Here’s what happens if you do:
- The top of the joint gets mushroomed.
- You can bend or crack your control arm.
- You might destroy the new joint before you even put it in.
- Worst case… you end up buying a whole new control arm.
Using the proper tool is like using a scalpel instead of a butter knife. It’s not extra, it’s smart.
Types of Polaris Sportsman 500 Ball Joint Removal Tools
Not all tools are created equal. Here’s a breakdown of what’s out there:
C-Press Ball Joint Tool Kit
This is the standard choice for most Sportsman 500 owners. It looks big and heavy, but it works.
- Removes and installs ball joints
- Fits most Polaris 500 models
- Works on other ATVs too
If a universal tool is a hoodie that fits everyone… this is the hoodie that actually stays on your shoulders.
ATV-Specific Cup Press Tool
These are shaped to match your Polaris control arm exactly.
- Perfect fit, less chance of slipping
- Protects the arm from damage
- Slightly more expensive but worth it if you want precision
Think of it like buying shoes in your exact size instead of guessing.
Threaded Rod Press (DIY Style)
This one’s for desperate or inventive people.
- Can work in a pinch
- Needs washers, plates, sockets, and patience
- Not recommended unless you enjoy problem-solving
If you like puzzles and improvising, this is fun… but it’s also risky.
How the Ball Joint Removal Tool Works
Here’s how it does its magic:
- Place a receiving cup behind the control arm.
- Position the press on the ball joint.
- Turn the screw slowly to apply pressure.
- The joint slides out cleanly… no hammering, no noise.
Most people expect a loud pop. It doesn’t happen that way. It just slides out quietly, almost apologetically.
Step-by-Step: Removing a Ball Joint
Here’s the exact process I follow now… it’s way easier than the first time I tried it.
1. Jack Up the ATV Safely
Lift your machine so the wheel hangs freely. Jack stands are your friend. Don’t skip them.
2. Remove the Wheel
Obvious, but important. You need space to work.
3. Disconnect Tie Rods and Brake Components
You don’t have to dismantle the world… just clear enough space for the tool to work.
4. Separate the Ball Joint Stud
A pickle fork works, or a ball joint separator. Either way, get the stud free.
5. Position the Removal Tool
This is where it counts. Make sure the cup and press are aligned perfectly, and grease the threads so it moves smoothly.
6. Turn the Press Slowly
The ball joint begins to slide out. If it resists, tap the control arm lightly… don’t rush it.
7. Remove the Old Joint
Voila… the old ball joint is out. Take a moment to feel smug about this small victory.
Installing the New Ball Joint
Using the same tool, you can install the new joint without bending a thing.
Tips that helped me:
- Freeze the new joint for 20–30 minutes. It shrinks slightly.
- Heat the control arm slightly. It expands just enough.
- Press the joint in straight… don’t force it crooked.
Even a slight angle off can make the joint fail faster. It’s worth taking your time here.
Signs You Need a New Ball Joint
Here’s how to know it’s time:
- Clunking noises over bumps
- Excessive wheel play
- Steering feels loose or wanders
- Uneven tire wear
Ball joints rarely die quietly… they tell you with sounds and movement.
Common Mistakes to Avoid
Here’s what most people do wrong:
- Misaligned cups in the press
- Dry threads on the press screw
- Over-torquing like you’re opening a vault
- Pressing the joint in upside down
Trust me… been there, learned the hard way.
Which Tool Works Best
If you want my advice… go with a C-Press Kit with ATV-Compatible Cups.
- Fits most Polaris 500 models
- Saves time and frustration
- Works for removal and installation
If you plan to work on other ATVs too, it’s a tool that pays for itself quickly.
Comparison Table
| Method | Difficulty | Safety | Cost | Recommended? |
|---|---|---|---|---|
| C-Press Tool | Easy | High | Medium | Yes |
| ATV-Specific Kit | Very Easy | Very High | Higher | Yes |
| Hammer Method | Hard | Low | Free | No |
| Threaded Rod DIY | Medium | Medium | Low | Only if necessary |
| Shop Labor | Zero | Very High | High | If you don’t want to DIY |
Frequently Asked Questions
How long does it take to remove a ball joint with the tool? Usually 10–20 minutes per joint, depending on corrosion and alignment.
Can I use the same tool on different Polaris models? Yes, most press kits fit multiple ATVs and UTVs.
Do I need to remove the control arm? No, the tool lets you remove the joint in place.
Should I replace both upper and lower ball joints at the same time? Yes. If one is worn, the other isn’t far behind.
Is heating the control arm safe before pressing? A little heat is fine. Don’t overdo it and damage the paint or bushings.
Key Takings
- The Polaris Sportsman 500 ball joint removal tool makes the job clean, safe, and precise.
- Pressing beats hammering every time for your control arm and your sanity.
- A proper C-press or ATV-specific tool gives the best results for removal and installation.
- Avoid mistakes like misaligned cups, dry threads, and crooked installs.
- Ball joints give warning signs before failure… listen to them.
- Doing the job with the right tool saves time, money, and future repairs.
Additional Resources
- All Balls Racing (Amazon Store): Reliable parts catalog with clear compatibility details for Polaris models.
- ATV Suspension Parts, Dennis Kirk: Easy-to-read technical breakdowns for DIY riders and mechanics.