Learn how long it takes for wood stain to dry, factors that affect drying time, and tips to ensure a smooth, professional finish.
If you’ve ever grabbed a brush, slapped on some wood stain, and wondered, “How long until this stuff dries?”, you’re not alone. I’ve been there. A few years back, I completely ruined a DIY coffee table because I rushed it. I stained it one night, assumed it was dry by the next morning, and went ahead with the topcoat. Big mistake. It turned into a sticky mess that never fully dried. That’s when I learned the hard way: knowing how long wood stain takes to dry is crucial for getting a smooth, professional finish.
In this guide, I’ll share everything I’ve learned, mistakes included. You’ll find out how long wood stain really takes to dry, what factors can speed it up or slow it down, and how to get perfect results without cutting corners. Whether you’re a woodworking pro, experimenting with stained glass projects, or tackling your first DIY endeavor, this guide will help set you up for success.
Article Breakdown
General Drying Times for Wood Stain
Let’s start with the basics. How long does wood stain take to dry? Well, it depends on what kind of stain you’re using and the environment you’re working in. Here’s a quick rundown:
| Type of Stain | Touch Dry | Fully Cured |
| Water-Based Stain | 1-4 hours | 24-48 hours |
| Oil-Based Stain | 6-12 hours | 48-72 hours |
| Gel Stain | 8-24 hours | 3-7 days |
“Touch dry” means the surface of the wood feels dry to the touch, but it’s not ready for heavier steps like sanding, applying a topcoat, or regular use just yet.
On the other hand, “fully cured” means the stain has completely set, hardened, and bonded with the wood. At that point, it’s safe for sealing, handling, or daily use.
Keep in mind, though, these are just general guidelines. The actual time it takes can vary depending on things like temperature, humidity, or the specific product you’re using. Let’s go into more detail about those factors.
Factors That Affect Drying Time
I wish I could tell you there’s a one-size-fits-all answer to wood stain drying times, but there isn’t. Over the years, I’ve learned that drying times are influenced by a mix of variables, some of which are entirely outside your control. Here’s what you need to know.
1. Type of Wood
The type of wood you’re staining plays a huge role in how quickly the stain dries.
- Hardwoods (like oak or maple): These woods are denser and less porous, so they don’t absorb as much stain. This means the stain often dries faster, usually within 4-8 hours to the touch.
- Softwoods (like pine or cedar): Softwoods are more porous and tend to soak up more stain, which can slow down drying times. You might need to wait 10-12 hours before the surface feels dry.
- Pressure-Treated Wood: This type of wood often contains moisture from the treatment process, which can interfere with the drying process. If you’re working with pressure-treated wood, expect longer drying times, sometimes up to 24 hours.
Pro Tip: If you’re working with softwoods, consider using a pre-stain conditioner. It helps the wood absorb stain more evenly and can prevent blotchiness, which is a common issue with porous woods.
2. Type of Stain
Not all stains are created equal, and the type you choose will dramatically affect drying times.
- Water-Based Stains: These dry the fastest, often within 1-4 hours. They’re a great choice if you’re on a tight timeline or working in humid conditions because water-based stains are less affected by moisture.
- Oil-Based Stains: These take longer to dry, typically 6-12 hours to the touch and up to 72 hours to fully cure. However, they’re prized for their rich, deep color and durability.
- Gel Stains: These are thicker and sit on the surface of the wood rather than soaking in. While they offer excellent color consistency, they take the longest to dry, up to 24 hours to the touch and several days to fully cure.
I once used a gel stain on a set of kitchen cabinets because I loved the idea of a thick, even finish. What I didn’t realize was how long it would take to cure. I had to wait almost a week before applying the topcoat, which delayed the entire project.
3. Environmental Conditions
The environment you’re working in can make or break your project. Here’s how:
- Temperature: Ideal staining conditions are between 50°F and 90°F. If it’s too cold, the stain won’t dry properly. If it’s too hot, it might dry unevenly.
- Humidity: High humidity levels can significantly slow down drying times, especially for water-based stains. Low humidity is ideal for faster drying.
- Airflow: A well-ventilated space can speed up drying times. Working outdoors or using fans to circulate air can make a big difference.
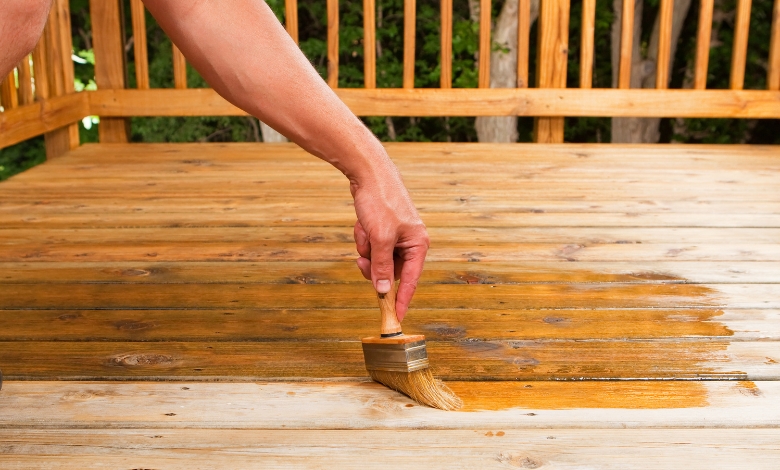
Example: Picture this: you stain a deck on a hot, humid summer day, thinking it’ll dry quickly because of the heat. But the high humidity keeps the moisture locked in, and the stain ends up staying tacky for days. Lesson learned? Check the weather forecast before starting your project!
Tips to Speed Up Drying Time
If you’re like me, patience isn’t always your strong suit. Thankfully, there are ways to speed up the drying process without compromising the quality of your finish.
1. Apply Thin Coats
One of the biggest mistakes I made early on was applying thick coats of stain. It seemed like a good idea at the time, more stain equals more color, right? Wrong. Thick coats take forever to dry and often end up uneven. Instead, apply thin, even coats and wipe off any excess stain with a clean cloth.
2. Stain in Ideal Conditions
Choose a day with warm temperatures (around 70°F) and low humidity. If you’re staining indoors, use a dehumidifier to keep moisture levels in check.
3. Improve Airflow
Set up fans to circulate air around the stained surface. Just be careful not to blow dust or debris onto the wet stain, it’s a nightmare to clean up.
4. Use a Heat Source
For small projects, a heat gun or hairdryer can help speed up drying in specific areas. Just don’t overdo it, too much heat can cause the stain to bubble or crack.
What to Do If It Rains After Staining
So, you’ve just finished staining your deck, and a surprise rainstorm rolls in. What now?
If the stain hasn’t dried yet, the rain can wash it away or leave the finish blotchy. In this case, you’ll need to let the wood dry completely, lightly sand the surface, and reapply the stain.
If the stain was touch dry before the rain, it might survive with minimal damage. Let it dry fully, assess the surface, and decide if a touch-up is necessary.
Always check the weather forecast before staining outdoor projects. I learned this the hard way when an unexpected drizzle ruined a freshly stained picnic table.
FAQs
Can I apply a second coat before the first one is dry?
No. Applying a second coat too soon can result in uneven color and a tacky finish. Always wait for the first coat to dry completely before applying the next.
How do I know when the stain is fully cured?
The surface should feel completely dry, and there should be no sticky or tacky spots. If in doubt, wait an extra 24 hours.
Why is my stain still tacky after 24 hours?
This is often caused by applying too much stain or working in high humidity. Wipe off excess stain with a clean cloth and improve ventilation to speed up drying.
Key Takings
- Drying times for wood stain can vary greatly depending on the type of wood, type of stain, and environmental conditions.
- Factors such as temperature, humidity, and airflow can significantly impact drying times.
- To speed up drying time, apply thin coats of stain, work in ideal conditions, improve airflow, and use a heat source if necessary.
- Always check the weather forecast before staining outdoor projects. If it rains before the stain has fully dried, you may need to sand and reapply.
Useful Resources
- Wood Staining Tips, Do’s & Don’ts: A comprehensive guide from Minwax covering essential do’s and don’ts for achieving perfect wood staining results.
- 5 Worst Wood Stain Mistakes: Learn about common wood staining mistakes and how to avoid them for a flawless finish.
- Tips/tricks for wood staining for a beginner: A helpful thread with practical advice for beginners starting their wood staining journey.
- 5 Things You Can DIY To Fix Wood Staining Mistakes: Tips on weatherproofing and fixing common wood staining issues to protect your outdoor furniture.